7.3 KiB
Deploying Fleet on AWS with Terraform
There are many ways to deploy Fleet. Last time, we looked at deploying Fleet on Render. This time, we’re going to deploy Fleet on AWS with Terraform IaC (infrastructure as code).
Deploying on AWS with Fleet’s reference architecture will get you a fully functional Fleet instance that can scale to your needs
Prerequisites:
- AWS CLI installed
- Terraform installed (version 1.04 or greater)
- AWS Account and IAM user capable of creating resources
- Clone Fleet or copy the Terraform files
Bootstrapping
To bootstrap our remote state resources, we’ll create a S3 bucket and DynamoDB table using the values defined in remote-state/main.tf. Override the prefix terraform variable to get unique resources and the region variable to use you preferred AWS region.
From the /remote-state directory, run:
terraform initterraform workspace new prodterraform apply -var prefix="<prefix>" -var region="<region>"
You should be able to see all the resources that Terraform will create — the S3 bucket and the dynamodb table:
Plan: 3 to add, 0 to change, 0 to destroy.

Do you want to perform these actions in workspace "dev"?

Terraform will perform the actions described above.

Only 'yes' will be accepted to approve.

Enter a value:
After typing yes you should have a new S3 bucket named <prefix>-terraform-remote-state And the table <prefix>-terraform-state-lock. Keep these handy because we’ll need them in the following steps.
Now that the remote state is configured, we can move on to setting up the infrastructure for Fleet.
Infastructure
https://github.com/fleetdm/fleet/tree/main/infrastructure/dogfood/terraform/aws
Next, we’ll update the terraform setup in the /aws directory's main.tf to use the S3 Bucket and DynamoDB created above:
terraform {
  // bootstrapped in ./remote-state
  backend "s3" {
    bucket         = "<prefix>-terraform-remote-state"
    region         = "<region>"
    key            = "fleet"
    dynamodb_table = "<prefix>-terraform-state-lock"
  }
  required_providers {
    aws = {
      source  = "hashicorp/aws"
      version = "3.57.0"
    }
  }
}
We’ll also need a tfvars file to make some environment-specific variable overrides. Create a file in the /aws directory named prod.tfvars, and copy/paste the variables below (note the bucket names will have to be unique for your environment):
fleet_backend_cpu         = 1024
fleet_backend_mem         = 4096 //software inventory requires 4GB
redis_instance            = "cache.t3.micro"
fleet_min_capacity        = 1
fleet_max_capacity        = 5
domain_fleetdm            = <domain> //YOUR FLEET DOMAIN
software_inventory        = "1"
vulnerabilities_path      = "/fleet/vuln"
osquery_results_s3_bucket = "<name>-osquery-results-archive-dev"
osquery_status_s3_bucket  = "<name>-osquery-status-archive-dev"
Now we’re ready to apply the terraform. From the /aws directory, Run:
terraform initterraform workspace new prodterraform apply -var-file=prod.tfvars
You should see the planned output, and you will need to confirm the creation. Review this output, and type yes when you are ready.
During this process, terraform will create a hosted zone with an NS record for your domain and request a certificate from AWS Certificate Manager (ACM). While the process is running, you'll need to add the NS records to your domain as well.
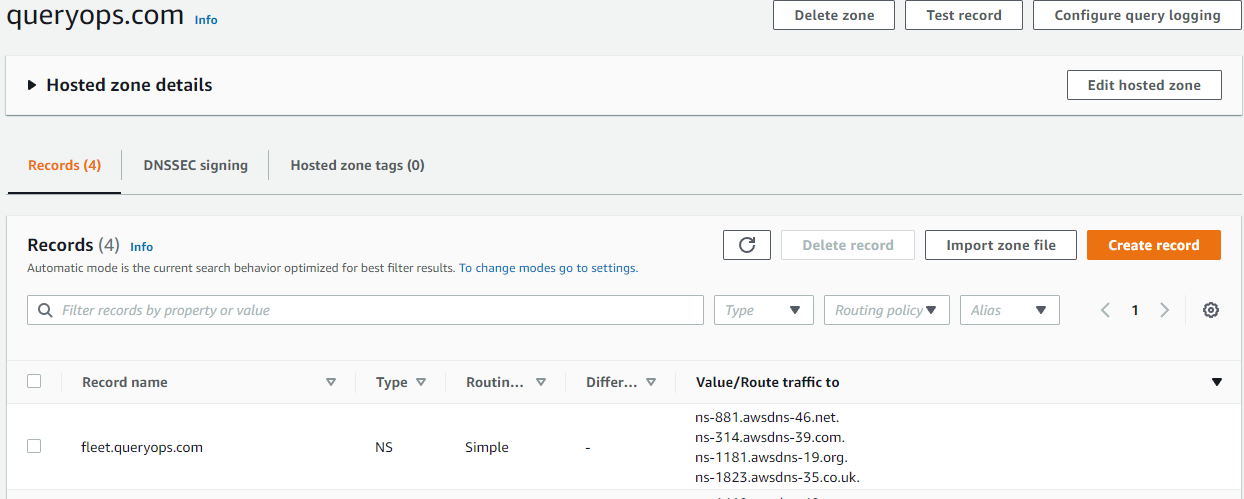
Let’s say we own queryops.com and have an ACM certificate issued to it. We want to host Fleet at fleet.queryops.com so in this case, we’ll need to hand nameserver authority over to fleet.queryops.com before ACM will verify via DNS and issue the certificate. To make this work, we need to create an NS record on queryops.com, and put the same NS records that get created after terraform creates the fleet.queryops.com hosted zone.
Once terraform apply finishes you should see output similar to:
acm_certificate_arn = "arn:aws:acm:us-east-2:123169442427:certificate/b2845034-d4e1-4ff2-9630-1c93feaf2185"
aws_alb_name = "fleetdm"
aws_alb_target_group_name = "fleetdm"
backend_security_group = "arn:aws:ec2:us-east-2:123169442427:security-group/sg-00c9fa9632d7e03ca"
fleet-backend-task-revision = 5
fleet-migration-task-revision = 4
fleet_ecs_cluster_arn = "arn:aws:ecs:us-east-2:123169442427:cluster/fleet-backend"
fleet_ecs_cluster_id = "arn:aws:ecs:us-east-2:123169442427:cluster/fleet-backend"
fleet_ecs_service_name = "fleet"
fleet_min_capacity = 2
load_balancer_arn_suffix = "app/fleetdm/3427efb8c09088be"
mysql_cluster_members = toset([
  "fleetdm-mysql-iam-1",
])
nameservers_fleetdm = tolist([
  "ns-1181.awsdns-19.org",
  "ns-1823.awsdns-35.co.uk",
  "ns-314.awsdns-39.com",
  "ns-881.awsdns-46.net",
])
private_subnets = [
  "arn:aws:ec2:us-east-2:123169442427:subnet/subnet-03a54736c942cd1e4",
  "arn:aws:ec2:us-east-2:123169442427:subnet/subnet-07b59b34d4e0850e5",
  "arn:aws:ec2:us-east-2:123169442427:subnet/subnet-084d808e122d776af",
]
redis_cluster_members = toset([
  "fleetdm-redis-001",
  "fleetdm-redis-002",
  "fleetdm-redis-003",
])
target_group_arn_suffix = "targetgroup/fleetdm/0f3bec83c8b02f58"
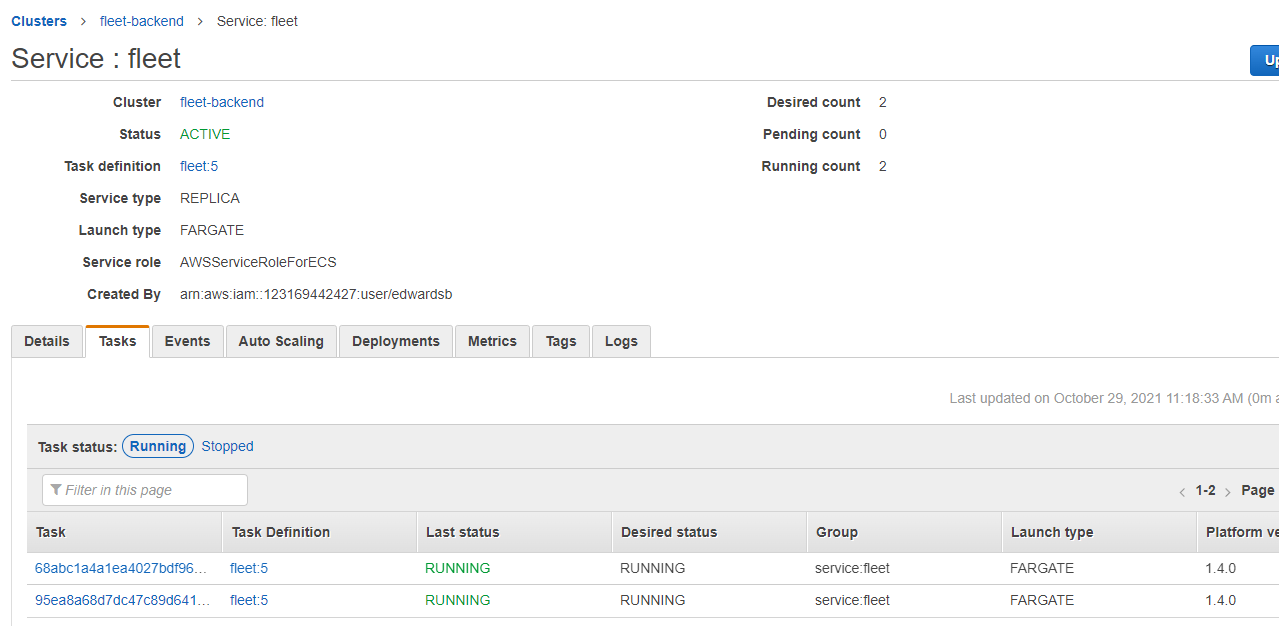
We can use the output here to create an AWS ECS Task that will migrate the database and prepare it for use.
aws ecs run-task --cluster fleet-backend --task-definition fleet-migrate:<latest_version> --launch-type FARGATE --network-configuration "awsvpcConfiguration={subnets=[<private_subnet_id>],securityGroups=[<desired_security_group>]}"
Where <private_subnet_id> is one of the private subnets, and <desired_security_group> is the security group from the output for example:
aws ecs run-task --cluster fleet-backend --task-definition fleet-migrate:4 --launch-type FARGATE --network-configuration "awsvpcConfiguration={subnets=[subnet-03a54736c942cd1e4],securityGroups=[sg-00c9fa9632d7e03ca]}"
Running this command should kick off the migration task, and Fleet should be ready to go.
Navigating to https://fleet.queryops.com we should be greeted with the Setup page.
Conclusion
Setting up all the required infrastructure to run a dedicated web service in AWS can be a daunting task. The Fleet team’s goal is to provide a solid base to build from. As most AWS environments have their own specific needs and requirements, this base is intended to be modified and tailored to your specific needs.

